
In our experience at Allen Paper Products, the gap between a returned order and a repeat order on custom packaging almost always comes down to the specs written below.
Elena runs a skincare brand in Barcelona. Her second production run of 3,000 custom sleeve boxes arrived in July, and within a week her fulfilment team filed a complaint she had never imagined: the outer sleeves were sliding off the trays inside the shipping cartons. Roughly 380 units reached the warehouse with the tray half-exposed and the printed panel scuffed. Nothing was misprinted. Nothing was miscut, at least not by the factory’s own tolerance sheet. The sleeves were simply 0.8 mm too generous.
That single fraction of a millimetre is the whole story of this packaging format. A tray and sleeve box has no magnet, no hinge and no lock. It holds together on friction alone, which means the gap between the tray wall and the sleeve interior is not a cosmetic detail, it is the closure mechanism. This guide walks importers through how custom sleeve boxes are engineered, what the tray and the sleeve each cost, how the structure compares with a traditional lid and base, and exactly which numbers to write into an RFQ so your supplier quotes the fit you actually want.
What a Tray and Sleeve Box Is (and How It Differs from a Flat Paper Sleeve)
First, a definition that clears up the most common sourcing confusion. A flat paper sleeve is a single printed band or folded wrap that goes around a product, a card, or another box. It has no floor and no walls. It is a decorative or informational belt, and it is quoted by the square metre of paper.
Based on Allen Paper Products production data (2024-2026), most of the defects and delays we see trace back to specs that were never written into the PO at the quotation stage.
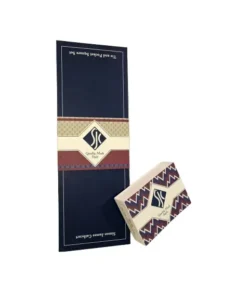
A tray and sleeve box is different in kind, not degree. It is a two-piece rigid or folding structure: an open-top tray that physically contains the product, plus a four-sided outer shell that slides over it. Both pieces are engineered as containers. The tray carries load, protects edges, and hosts the insert. The sleeve carries the graphics, hides the tray, and creates the pull-out reveal that shoppers photograph.
The practical consequence is that these two products live in different price universes. A printed band is pennies. A structural two-piece box carries board cost, wrapping labour, and assembly on both halves. Buyers who ask a factory for a sleeve without specifying which one they mean routinely receive quotes that differ by a factor of six, then assume one supplier is cheating.
Three visual cues separate the formats in a spec drawing. A tray and sleeve box shows a die line with four glued or wrapped corners on the inner piece. A flat sleeve shows a single rectangle with one glue flap. And a slipcase, closed on five sides with one open end, sits between the two, which we cover further down.
Where do brands use custom sleeve boxes? Subscription boxes lead, because the reveal motion is repeatable and photogenic. Skincare and supplement sets follow, since a tray holds bottles upright in a fixed grid. Tech accessories, stationery kits, tea samplers, chocolate collections and corporate welcome kits all use it. Anywhere the product needs to sit in a visible arrangement rather than tumble loose, the tray earns its cost.
The Friction Question: How Tight Should Custom Sleeve Boxes Be?
Here is the engineering heart of the format. Custom sleeve boxes are held closed by interference fit, the internal dimension of the sleeve is intentionally close to the external dimension of the tray, and the resulting friction resists gravity and vibration.

Too loose and you get Elena’s problem: sleeves migrate in transit, panels scuff, and the unboxing feels cheap. Too tight and you get the opposite failure, which is worse in a retail environment. A sleeve that requires two hands and a tug will crease at the leading edge, delaminate at the glue seam, or tear the tray wrap when a customer forces it.
Factories in China usually quote custom sleeve boxes to one of three fit classes. Ask for them by name, because the terminology is fairly consistent across the industry.
| Fit Class | Clearance per Side | Pull Force Feel | Best For | Main Risk |
|---|---|---|---|---|
| Tight / Interference | 0.1-0.3 mm | Firm, two-finger pull | Luxury reveal, heavy trays | Edge crease, wrap tear |
| Standard | 0.4-0.6 mm | Smooth, single-hand slide | Most retail and e-commerce | Balanced, few issues |
| Loose / Gift | 0.7-1.0 mm | Falls under own weight | Hand-assembled gift sets | Sleeve slips in transit |
Clearance per side means the gap between one tray wall and the matching sleeve wall. Total added width is therefore double the figure shown. A standard fit on a 200 mm wide tray gives a sleeve internal width of roughly 200.8 to 201.2 mm.
Three variables push the correct clearance up or down. Board thickness comes first: a 2 mm greyboard tray wrapped in 157 gsm art paper has more spring-back than a 1.5 mm tray, so it needs slightly more room. Lamination comes second: matte film adds grip, gloss film adds slip, and soft-touch film grips hardest of all. A soft-touch sleeve on a soft-touch tray at 0.2 mm clearance can lock so firmly that it becomes genuinely unopenable in humid weather.
Humidity is the third and most underrated variable. Paperboard absorbs moisture and expands across the grain. A fit approved in a dry Guangdong November can bind badly after six weeks in a container crossing the tropics. Experienced buyers specify a fit at the loose end of tight, or the tight end of standard, precisely to absorb that seasonal swing.
Mini story: A Canadian tea brand ordered 5,000 units with a 0.15 mm interference fit because the founder loved the resistance on the sample. The bulk shipment landed in Vancouver in February after 34 days at sea. Warehouse staff reported that 1 in 6 sleeves needed a knife to start, and 210 boxes were written off with torn wrap. The reorder moved to 0.45 mm and the complaint rate fell to zero.
Tray Construction: Board, Wall Height and Insert Options
In custom sleeve boxes, the tray is where the structural budget goes. It carries the product weight, absorbs drop shock, and defines whether the box feels premium or disposable.

Three tray constructions dominate. A wrapped rigid tray uses greyboard between 1.2 mm and 3 mm, cut, corner-taped, and hand-wrapped with printed paper. It is the luxury default and the most labour-intensive. A folded paperboard tray is die-cut from a single sheet of 350-450 gsm SBS or kraft board and glued at four corners; it costs far less and ships flat. A corrugated tray, usually E-flute or F-flute, sits between them and is the workhorse for heavier subscription contents.
| Tray Type | Typical Board | Load Capacity | Ships Flat | Relative Cost |
|---|---|---|---|---|
| Wrapped rigid greyboard | 1.5-3 mm greyboard | High, 2-5 kg | No | $$$ |
| Folded paperboard | 350-450 gsm SBS | Low, under 800 g | Yes | $ |
| E-flute corrugated | 1.5 mm E-flute | Medium, 1-3 kg | Yes | $$ |
| Litho-laminated corrugated | E-flute plus 157 gsm | Medium-high | Yes | $$ |
| Moulded pulp tray | Recycled fibre | Medium | No, nests | $$ |
Wall height is a design decision with real cost consequences. A tray wall that matches the sleeve height exactly gives a clean flush look but leaves no finger access, so the customer must tip the whole assembly to slide the tray out. A tray 3-5 mm shallower than the sleeve creates a natural shadow gap. Many brands instead cut a thumb notch, typically 25 mm wide and 12 mm deep, into one long wall. The notch costs nothing extra on a die-cut tray and transforms the opening experience.
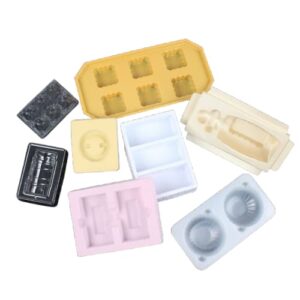
Inserts multiply the value of the tray. A die-cut corrugated grid divides bottles cleanly and costs the least. EVA foam holds irregular shapes and feels dense and premium. Moulded pulp gives a recyclable cradle with a soft, matte look that photographs well. Paper honeycomb is the newest option and appeals to brands removing plastic from the box entirely.
One detail buyers forget: the insert must be dimensioned against the tray internal size, not the sleeve internal size. Specifying an insert to the wrong reference is the single most common cause of an insert that will not drop in, and it usually surfaces only after the tooling is cut.
Sleeve Construction: Board Weight, Glue Seam and Print Wrap
The sleeve looks simple. It is a four-panel tube with one glue seam. Everything that goes wrong with it, however, traces back to three decisions.
Board weight sets rigidity. On custom sleeve boxes below 250 gsm the outer piece buckles when a customer grips it, and the printed face shows finger ripples. Between 300 and 400 gsm the tube holds its rectangle. Above 400 gsm, or with a wrapped rigid sleeve, the piece feels like a book slipcase and adds meaningful cost. Most retail work lands at 350 gsm coated board, sometimes with an E-flute laminate for larger footprints.
Glue seam placement decides where the ugly line lives. Put it on a short side panel, not the back panel, if your artwork has a continuous pattern; the overlap will always break a pattern by 1-2 mm. Ask your supplier to mark the seam position on the die line before you finalise artwork, and ask whether the seam is inside-lapped or outside-lapped, since outside-lapped seams catch on the tray during insertion.
Print wrap direction matters on rigid sleeves. A wrapped sleeve has visible paper turn-ins on both open ends. Turn-in depth of 15-18 mm is standard; below 12 mm the greyboard core can peek through after a few slides. Specify the turn-in and ask for a photo of the internal end so you can see whether the core is covered.
Finishing choices on the sleeve carry the brand. Soft-touch lamination, spot UV, foil stamping and embossing all work here, and because the sleeve is a flat tube before folding, finishing costs less than on a complex structure. Restraint pays: one hero treatment plus clean print consistently outperforms a sleeve carrying three competing effects.
Ventilation is a small, clever detail. Some factories punch a 6-8 mm hole in one sleeve panel so trapped air can escape as the tray slides in. Without it, a tightly fitted tray creates a piston effect that pushes the sleeve back out. It costs nothing and solves an assembly complaint that otherwise looks unexplainable on the packing line.
Custom Sleeve Boxes vs Lid and Base: Where the Money Actually Goes
Buyers usually arrive at this format after pricing a two-piece lid and base box and finding it expensive. The comparison deserves honest treatment, because the sleeve format wins on some lines and loses on others.
| Factor | Tray and Sleeve | Lid and Base |
|---|---|---|
| Board consumed | Lower, sleeve has no floor | Higher, both halves floored |
| Wrapping labour | 2 pieces, sleeve is simpler | 2 pieces, both complex |
| Shipping volume | Can ship flat if folded | Usually nests, bulkier |
| Print area shown | Full sleeve wrap, uninterrupted | Lid top plus lid walls |
| Perceived luxury | Modern, editorial | Traditional, formal |
| Closure security | Friction only | Gravity plus wall overlap |
| Reorder tooling | 2 dies | 2 dies plus depth tolerance |
Custom sleeve boxes save board because the outer piece has no bottom panel. On a 220 × 160 × 45 mm box, that is roughly 15 to 20 percent less material in the outer component. It also saves wrapping labour, since a flat tube is quicker to wrap than a lidded shell with four corners and a top.
Where it loses is closure security and stacking. A lid and base box holds itself shut when dropped; a sleeve does not. If your product ships alone in a polybag rather than inside a mailer, the sleeve format is a poor choice unless you add a belly band or a sticker seal.
There is also a subtle merchandising trade-off. A lid and base box shows a lidded top on a shelf, which reads as formal gifting. A sleeve shows a full wraparound canvas that suits editorial photography and pattern-led branding. Neither is better; they speak to different buyers.
Mini story: A UK subscription brand shipping 4,200 boxes a month switched from a wrapped lid and base to a folded tray with a 350 gsm sleeve. Unit cost fell from 1.42 USD to 0.86 USD, and because both pieces shipped flat, container utilisation improved enough to cut inbound freight per unit by about 31 percent. Churn did not move. The founder later described the lid and base as the most expensive thing nobody had noticed.
Slipcase Packaging and Other Sleeve Variants Worth Knowing
Not every outer shell is a plain four-sided tube. Three variants come up often in quotes, and knowing the vocabulary prevents mismatched pricing.
Slipcase packaging is closed on five sides with a single open end, like a book case. It is more rigid than an open-ended sleeve and protects the contents from dust on four faces. It costs more because it needs a wrapped closed end and cannot be shipped as a simple flat tube. Book sets, card decks and premium notebook kits use it heavily.
A double-open-ended sleeve is the standard tube discussed above. Its advantage is simplicity and the fact that the tray can be pulled from either side, which speeds hand assembly on a packing line.
A partial or belly sleeve covers only part of the tray height, typically 40 to 70 percent, leaving product visible above or below. It uses less board and can turn a plain tray into a branded unit for a very low incremental cost. Food, candles and bath products favour it. The US baseline for food-contact material is FDA food contact rules.
A window sleeve adds a die-cut aperture so the product shows through. Leave it open for a plastic-free claim, or apply a PET film patch for dust protection. Window die-cuts weaken the panel, so add 30-50 gsm to the board weight when the aperture exceeds a third of the panel area.
Magnetic hybrid formats exist too, where a rigid tray sits inside a sleeve with a discreet magnet closure at the open end. They are rare, cost more than a plain box with outer sleeve, and mainly appear in electronics and jewellery presentation.
MOQ, Tooling and Pricing for Sleeve Box Wholesale Orders
Minimum order quantity for custom sleeve boxes with a folded tray typically starts around 500 sets. Wrapped rigid trays push the MOQ to 1,000 because hand-wrapping needs a viable labour batch. Add foil, and most factories want 2,000 to justify the die.
Tooling is charged once. Expect a cutting die at 60 to 180 USD per piece, so a tray plus a sleeve means two dies. Offset plates run 20 to 50 USD per colour. A foil die adds 80 to 200 USD depending on size and detail. Confirm in writing that the factory archives your dies and plates so reorders skip these fees entirely.
| Quantity (sets) | Folded Tray + Sleeve | Rigid Tray + Sleeve | + Foil on Sleeve | + Die-Cut Insert |
|---|---|---|---|---|
| 500 | 1.05 | 2.30 | 2.75 | 2.95 |
| 1,000 | 0.82 | 1.85 | 2.20 | 2.40 |
| 3,000 | 0.64 | 1.48 | 1.72 | 1.90 |
| 10,000 | 0.48 | 1.19 | 1.36 | 1.52 |
Figures are indicative USD per complete set for a 220 × 160 × 45 mm box, FOB, and will move with board price, finish and freight. They illustrate the pattern rather than a quotation. The steep drop between 500 and 3,000 sets is tooling amortisation, not a discount on materials.
Two costs hide outside the unit price. First, assembly: if the factory pre-inserts the tray into the sleeve, you pay a few cents per set but save your own warehouse labour. Second, packing: a set shipped assembled takes more cartons than a set shipped as flat sleeves plus nested trays. On long ocean routes that difference alone can exceed the assembly saving, so ask the factory to quote both scenarios and compare landed cost, not unit cost.
Mini story: An Australian coffee roaster in Brisbane compared two quotes for 6,000 sampler sets. Supplier A quoted 0.71 USD assembled, Supplier B 0.66 USD flat-packed. On paper B looked cheaper. Assembled sets needed 47 cartons, flat-packed needed 29, and the freight gap came to 0.09 USD per set. The roaster took the assembled quote and saved roughly 240 USD on the shipment plus two days of in-house labour.
7 Specs to Lock Before You Approve Custom Sleeve Boxes
Run this list against every pre-production sample. Each item traces back to a real dispute that a written number would have prevented.
- Fit clearance in millimetres per side, do not accept a description like snug; write 0.5 mm and require it on the sample report.
- Tray board type and calliper, greyboard thickness or board gsm, stated exactly, with a physical swatch.
- Sleeve board weight and lamination, including whether matte, gloss or soft-touch, since film changes friction.
- Glue seam position and lap direction, marked on the approved die line, inside-lapped by default.
- Turn-in depth on wrapped pieces, 15 mm minimum, with a photo of the internal end panel.
- Insert reference dimension, confirmed against tray internal size, never sleeve internal size.
- Assembled or flat-packed delivery, with carton count and packing method stated in the same document.
The fit clearance is the one that separates experienced buyers from first-timers. Everything else on this list appears in a normal spec sheet; clearance almost never does, and it is the number that decides whether your custom sleeve boxes feel engineered or accidental.
The RFQ Line That Gets Accurate Custom Sleeve Boxes Quotes
A complete request removes three rounds of email. Send artwork, dimensions and the following in one message.
- Tray internal length, width and height in millimetres
- Tray construction: folded, wrapped rigid, or corrugated, with board spec
- Sleeve board weight and print sides
- Required fit clearance per side
- Lamination and any foil, emboss or spot UV areas
- Insert type, material and cavity count
- Quantity, delivery date, destination port and Incoterm
- Assembled or flat-packed, with preferred carton count
RFQ line: Please quote 3,000 sets custom sleeve boxes, tray 220x160x45mm internal, 1.5mm greyboard wrapped in 157gsm matte art paper, outer sleeve 350gsm coated board CMYK outside, 0.5mm clearance per side, E-flute die-cut insert with 4 cavities, flat-packed and assembled options, FOB Shenzhen, delivery by 2026-10-15.
That single paragraph, plus a vector die line, is enough for a competent factory to quote within a day. It also becomes your evidence if the delivered goods differ from what you described, which is why it belongs in the purchase order rather than in a chat thread.
Sampling, Quality Control and Getting the Fit Across the Ocean
Order a physical sample of your custom sleeve boxes before bulk, and order it in the season you will ship. A sample approved in dry weather and produced in a humid month can behave differently, so tell the factory your production window and ask them to condition the sample stock accordingly.
Test the sample the way a customer will. Slide the sleeve on and off twenty times and inspect the leading edge for creasing. Hold the assembled unit vertically by the sleeve and see whether the tray drops. Load the tray to its full intended weight before testing, since an empty tray slides differently. Photograph the internal end panels to check turn-in coverage.
For bulk inspection, use AQL 2.5 for major defects and add three sleeve-specific checks that a generic checklist will miss: fit consistency across the batch measured on at least ten random sets, sleeve squareness after folding, and scuffing on the printed face where the sleeve meets the tray edge.
Packing protects everything you just approved. Ask for a poly liner and desiccant in each export carton, especially for greyboard trays, which absorb ambient moisture fastest. Request that assembled sets be packed lying flat rather than standing, because a standing sleeve carries carton compression on its open edge and arrives out of square. European buyers increasingly check EU packaging waste rules before signing off artwork.
Finally, plan the calendar honestly. Sampling takes 7 to 12 working days, bulk production 15 to 25 days for rigid trays and 10 to 18 for folded ones, and ocean freight adds 25 to 45 days. Chinese New Year removes two to three weeks. Buyers who consolidate their sleeve box wholesale order with other printed items in the same container get one QC visit, one set of documents and a materially lower cost per unit landed.
FAQ
What is the difference between a sleeve box and a flat paper sleeve?
A sleeve box is a two piece structure: an open tray that holds the product plus an outer shell that slides over it. A flat paper sleeve is a single printed band with no floor or walls. The two pieces of a sleeve box are both containers, so the format costs several times more per unit.
How much clearance should there be between the tray and the sleeve?
Most retail projects work well at 0.4 to 0.6 mm of clearance per side, which gives a smooth single hand slide. Luxury reveals use 0.1 to 0.3 mm for a firmer pull. Anything above 0.7 mm risks the sleeve slipping off in transit. Always state the figure in millimetres on your drawing.
What is the minimum order quantity for custom sleeve boxes?
Folded trays with printed sleeves usually start at 500 sets. Wrapped rigid trays typically need 1,000 sets because hand wrapping requires a viable labour batch. Foil stamping or embossing often pushes the minimum to 2,000 sets so the die cost can be spread. Digital printing allows smaller runs at a higher unit price.
Are tray and sleeve boxes cheaper than lid and base boxes?
Usually yes. The outer sleeve has no bottom panel, so it consumes roughly 15 to 20 percent less board than a lid, and a flat tube wraps faster than a lidded shell. The saving disappears if you add a rigid wrapped sleeve or a slipcase, and closure security is lower than a lid and base.
Can a sleeve box ship flat to save freight?
Folded trays and unglued sleeves can both ship flat, which often cuts inbound freight per unit by a quarter or more. Wrapped rigid trays cannot fold and must nest instead. Ask your factory to quote assembled and flat packed separately, then compare landed cost including carton count rather than unit price alone.
Which insert works best inside a sleeve box tray?
Die cut corrugated inserts cost the least and divide bottles cleanly. EVA foam suits irregular shapes and feels dense. Moulded pulp gives a recyclable cradle with a soft matte look. Paper honeycomb suits brands removing plastic entirely. Dimension every insert against the tray internal size, never the sleeve internal size.
What should I specify when ordering custom sleeve boxes?
Start with the build itself: material, size, print, finish, and any insert, then name the tolerance and the test. At Allen Paper Products we confirm the build with a pre-production sample (PPS) before any bulk run, so the order matches your approved proof.
How long does it take to get custom sleeve boxes made and delivered?
Lead time runs from about 7-10 days for a sampled reorder to 20-35 days for a new custom build including proofing and production. Based on Allen Paper Products production data (2024-2026), most overseas buyers plan 4-6 weeks door-to-door.